I started blogging website way back in 2012 on Blogger.com.
But the design constraints kept me from blogging full-fledged.
Then, I was introduced to WordPress two years back in 2017, and it completely changed how websites or blogging website/s could be made so easily.
So I am here penning down the steps which I followed to set up my blog using WordPress.
Few of you must have a concern like why WordPress? In today’s time, WordPress has become the most popular blogging website builder.
It alone helps more than 34% of the internet to build blogs, that’s more than 661 new WordPress websites that are launched every day.
Before we begin building our blogging website, using WordPress. You should know that more than a quarter of the world’s e-commerce websites are powered by WordPress.
Isn’t it impressive? Now let me help you to with the following 11 Steps to Setup your blog. This will be helpful for beginners who haven’t worked with WordPress too.
- Step 1: Register a Blog Name (Domain Name) for Your Blogging Website
- Step 2: Choose a Hosting Provider
- Step 3: Install WordPress
- Step 4: Pick the Fastest WordPress theme
- Step 5: Personalize Contents as per Your Niche
- Step 6: Set the WordPress Settings for The Blogging Website
- Step 7: Install Required Plugins
- Step 8: Add Content like Posts
- Step 9: Optimize your content, Images, Site
- Step 10: Make your Content Google Search Ready
- Step 11: Share Your Writing on Social Media
- Step 12: Monetize
- Sit Back and Relax
Now, after the overview let’s dive into the detailed process –
Step 1: Register a Blog Name (Domain Name) for Your Blogging Website
The first thing which you need to keep in mind while picking a Blog Name is how catchy or easy to remember it is.
What is a Blog Name and Domain Name?
In simple terms, the domain name is your blog name. This will be the URL people will enter on the browsers to visit your blog or website.
Let’s say you blog and your name is Raj – you could register your domain name as rajblogs.com
You can choose a domain extension of your choice, while it totally depends on the purpose of your website.
If you blog you could choose yournameblogs.com or other examples like – sumandhar.com.
There are even many blog name generators available like Nameboy, where you just need to enter the keyword and you will be able to choose from multiple suggestions to help you out.
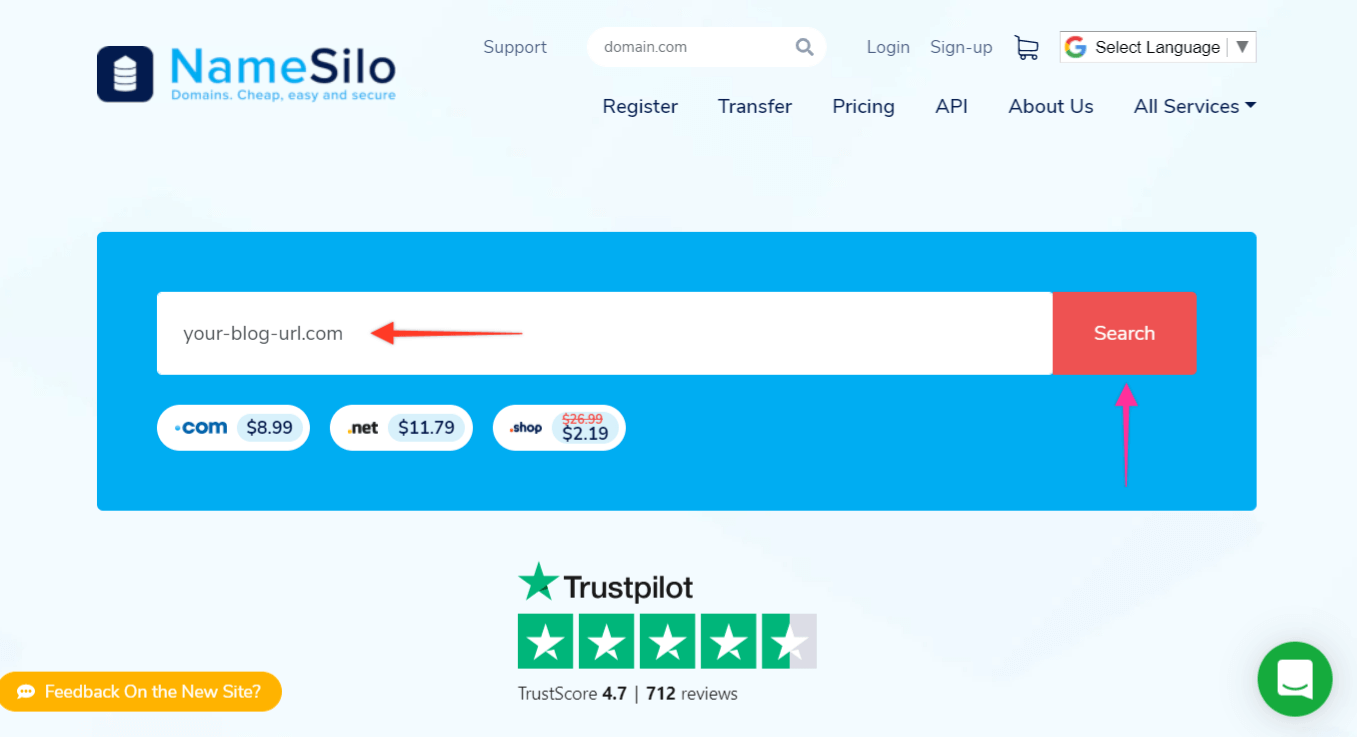
I personally prefer GoDaddy or Namesilo to purchase the domain, as you can find cheap domain names. Also, as it helps you with domain name suggestions.
As you look for the perfect domain name, go with the one which suits your content or profession. This makes it easier to find the right domain name.
Now, purchasing could cost you around 1000 bucks a year in INR.
Always look for some promo codes to save a few hundred bucks, or get in touch with the support to help cut you a deal. 😉
Step 2: Choose a Hosting Provider
Domain selling websites will always provide you with a few options while purchasing the hosting options of their own.
Let me help you understand and with a trick to make this a sweet deal for you?
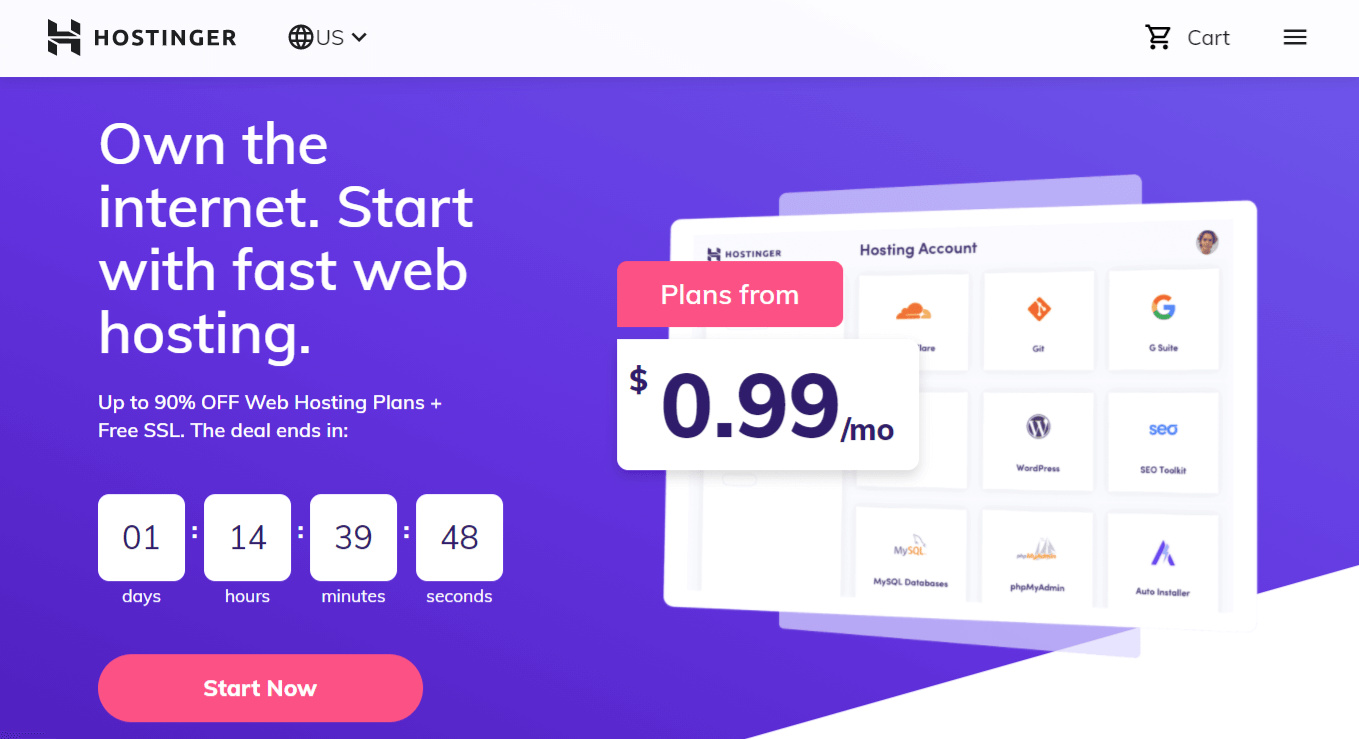
You can go with Hostinger to help you with a good hosting provider. What is that? The hosting is the place where your website will be hosted, in simpler terms where all your website content is stored.
To make the process of choosing a Hosting Provider easier, by going with – Hostinger, you will also have a few options like adding an SSL make sure you take it.
Read on How to Find and Setup the Cheapest and Free SSL?
What is SSL? SSL is encryption that helps to keep your website secure and provides a secure connection and doesn’t alert users visiting websites your website if you are not on a secure connection.

While you can check out the Hostinger’s #BlackFridaySale to up to 90% OFF on hosting plans and Free SSL. No kidding go check yourself. [ Link here -Similar offers for 2021 #StayTuned ]
Step 3: Install WordPress
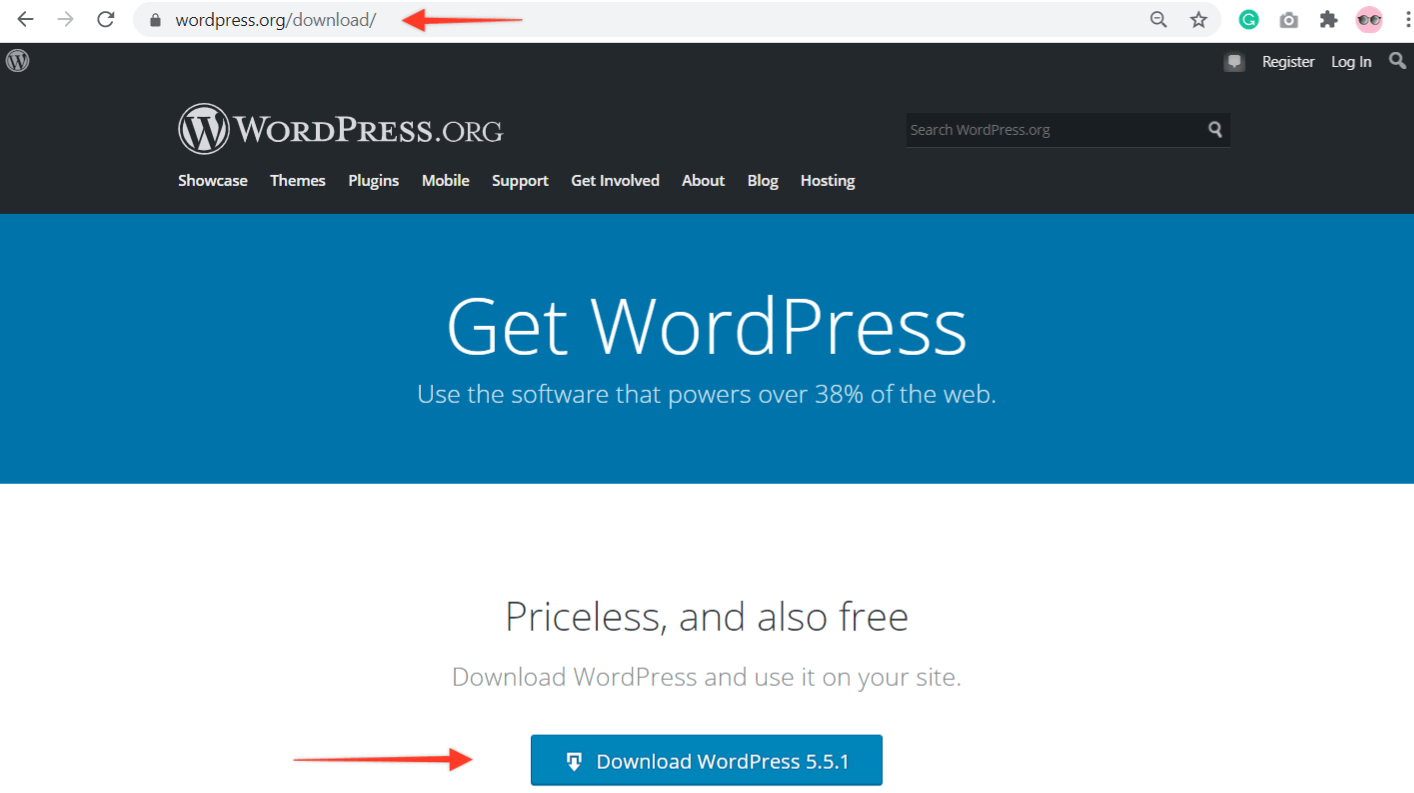
Now, if you go with GoDaddy or most hosting providers, they provide a one-click WordPress installation which will help set up your initial WordPress setup.
Let me take you through the process? In a few minutes of your purchase, you will be able to set up your WordPress by creating an account by signing up for your blog.
This account will allow you to log in to the WordPress dashboard admin account. Make sure you set a Strong Password and store it in a secure manner or remember the same.
You will be able to move around and start writing posts if you are a blogger which would be displayed on frontend, while we still have a few things left to do.
WordPress allows you to display a Blog page which displays the posts for bloggers.
While there are Pages in WordPress which allow you to display content and there is also a Blog Page that would display all the Posts here.
Step 4: Pick the Fastest WordPress theme
A WordPress theme simply helps change design and the layout of your website.
There are various themes available in the market ranging from free to paid.
A free theme will help you set up a website with basic functionality.
We will go with a free Astra theme to keep your site lightweight and fast, it might not look shiny from the outside but this theme is light as a feather.
I am using the same theme on this site, you can choose any other theme that suits you. This theme provides ton of interesting features even in the free version.
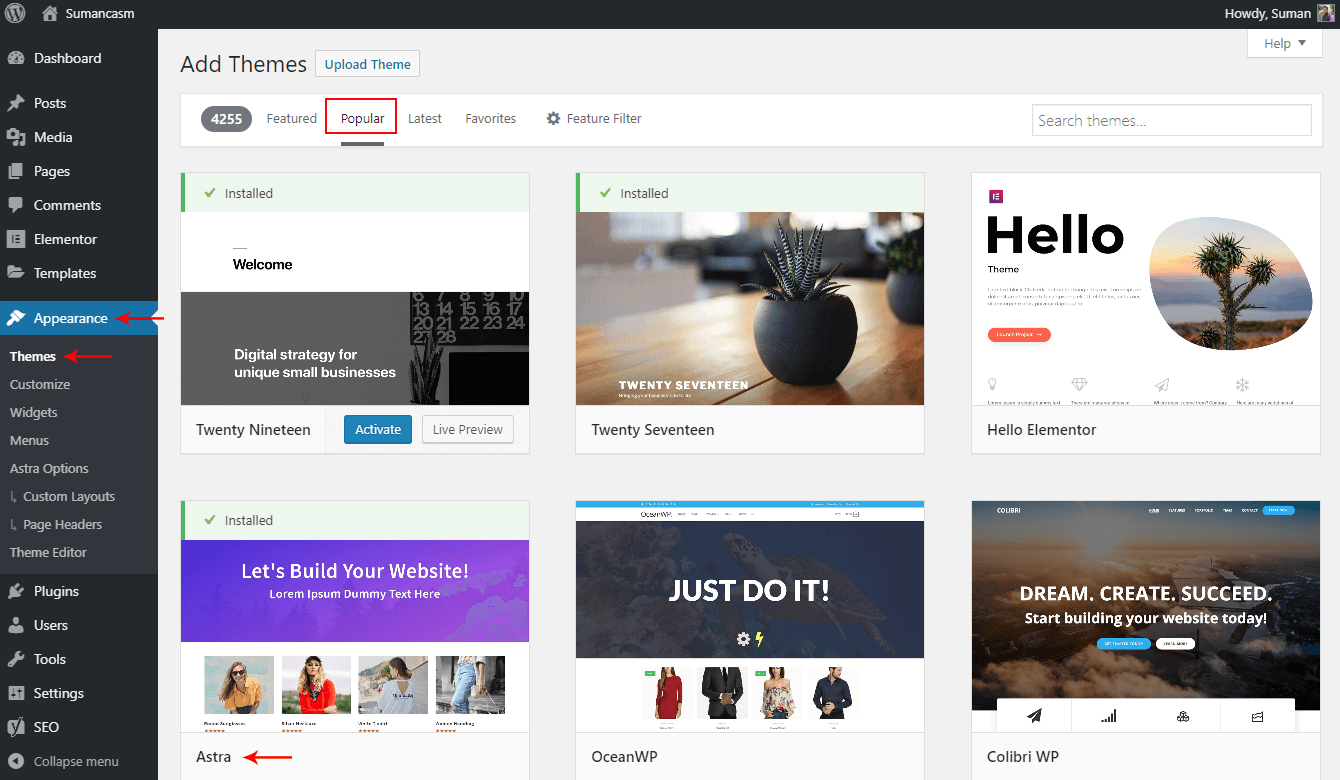
You can look for themes from the WordPress Dashboard > Appearance > Themes > Add New
On the top, you can search or check out the recommended themes, preview the one you like and you can apply to your website.
This is mostly as a mobile theme, it would change your layout that is structure of the contents on the frontend, style them, etc.
We will continue with the Astra theme, and the next step you can click on the Get Started button this would install a Page Builder, this will help you set your contents on the page.
After that we will see an Astra Starter Sites option, this feature allows you to select a website that will be imported.
You simply now require to update the content based on your requirement, and you are good to go.
Step 5: Personalize Contents as per Your Niche
The Astra theme allows you to edit and update every content after import.
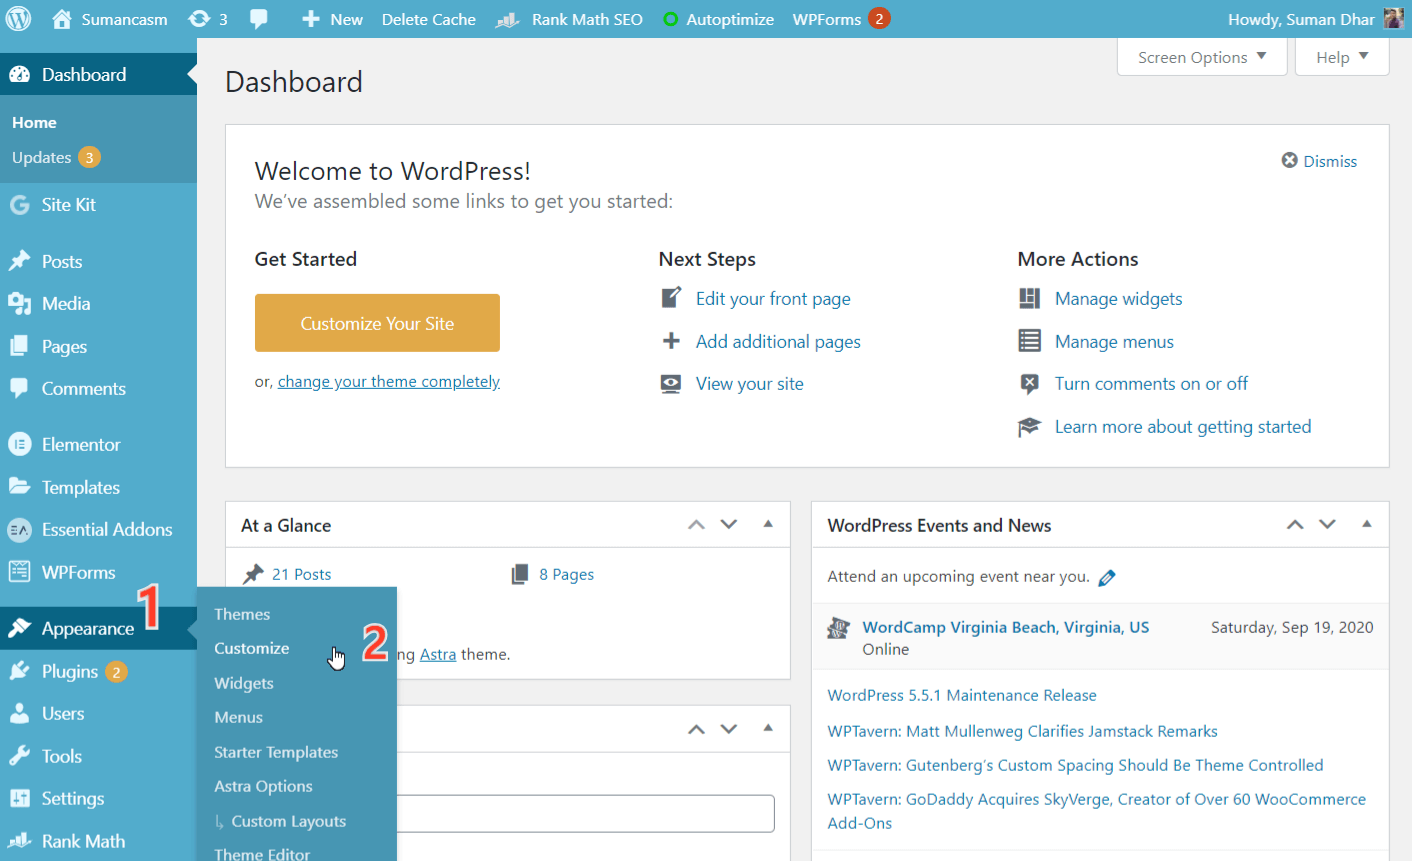
Simply visit the Customizer option under the Appearance to help you make changes.
Start with adding your website Logo, making changes to the menu items. Add or remove menu items, add relevant content to the Pages like the Home page.
Setup the most important page of your website, the Contact page, this where the viewers can reach out for inquiries.
Now let’s change the look and feel of your website, to do so you need to visit the Customizer from the Dashboard > Appearance > Customize.
Go to the Global Colors, and edit the theme color, font color, size, etc. This will give your site, similar look throughout your website.
Step 6: Set the WordPress Settings for The Blogging Website
With your website, getting a feel and look as required. It’s time to define the structure and verify the links on the menu, sidebar, etc.
Head over to Customizer or you can go to Appearance > Menus for setting your Primary Menu also called Main Menu which will be displayed on the homepage and other pages.
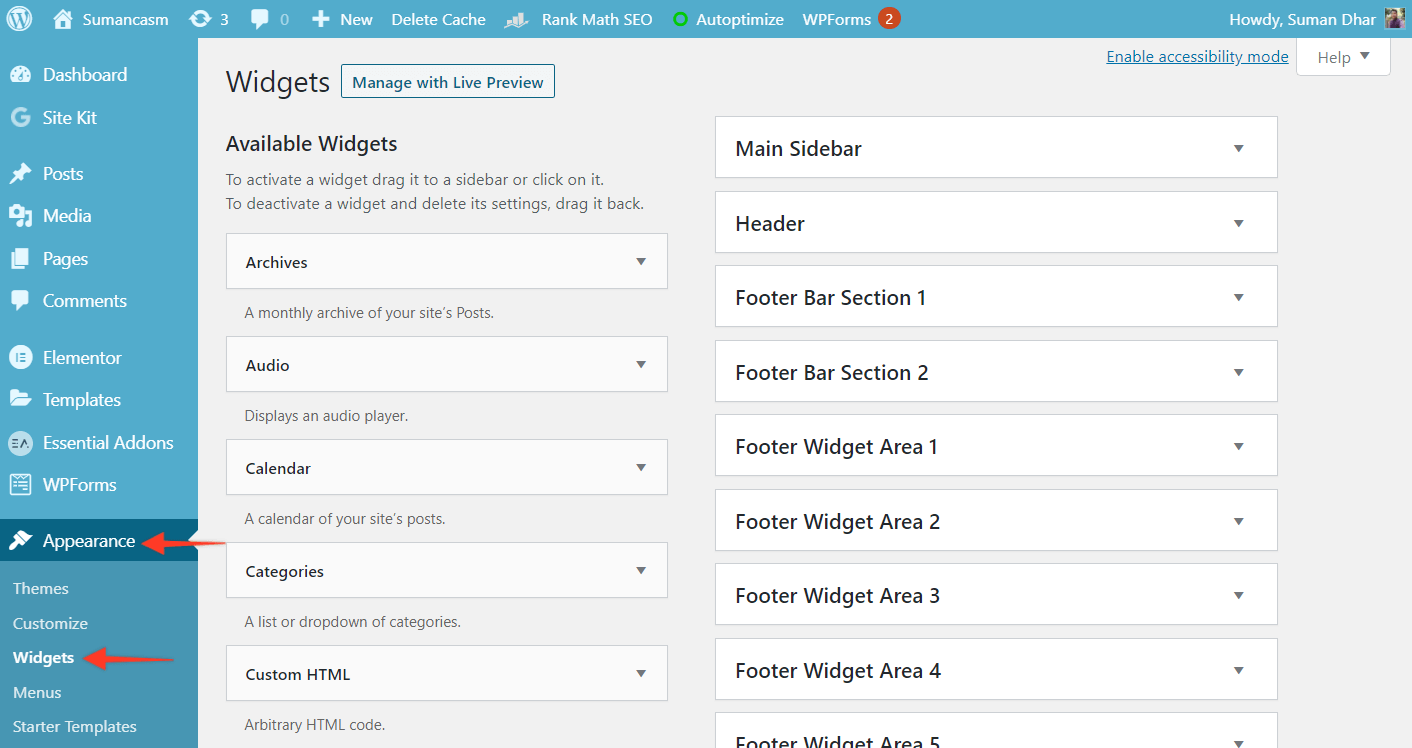
And under Appearance > Widgets, you can set the Footer Blocks or Sidebar Blocks where you can choose what needs to be displayed.
You can choose the Latest Posts for your blog. A search bar to search for posts on your blog. Also, display the Posts categories which will display specific posts categories.
Here you will need to just drag and drop the widgets, and assign where it needs to be displayed.
Step 7: Install Required Plugins
If you don’t want to add content through the default WordPress’ Gutenberg editor, you can choose any Page Builder like Beaver Builder or Elementor and other page builders available as per your requirement.
My personal favorite has been Elementor, easy to set up and use.
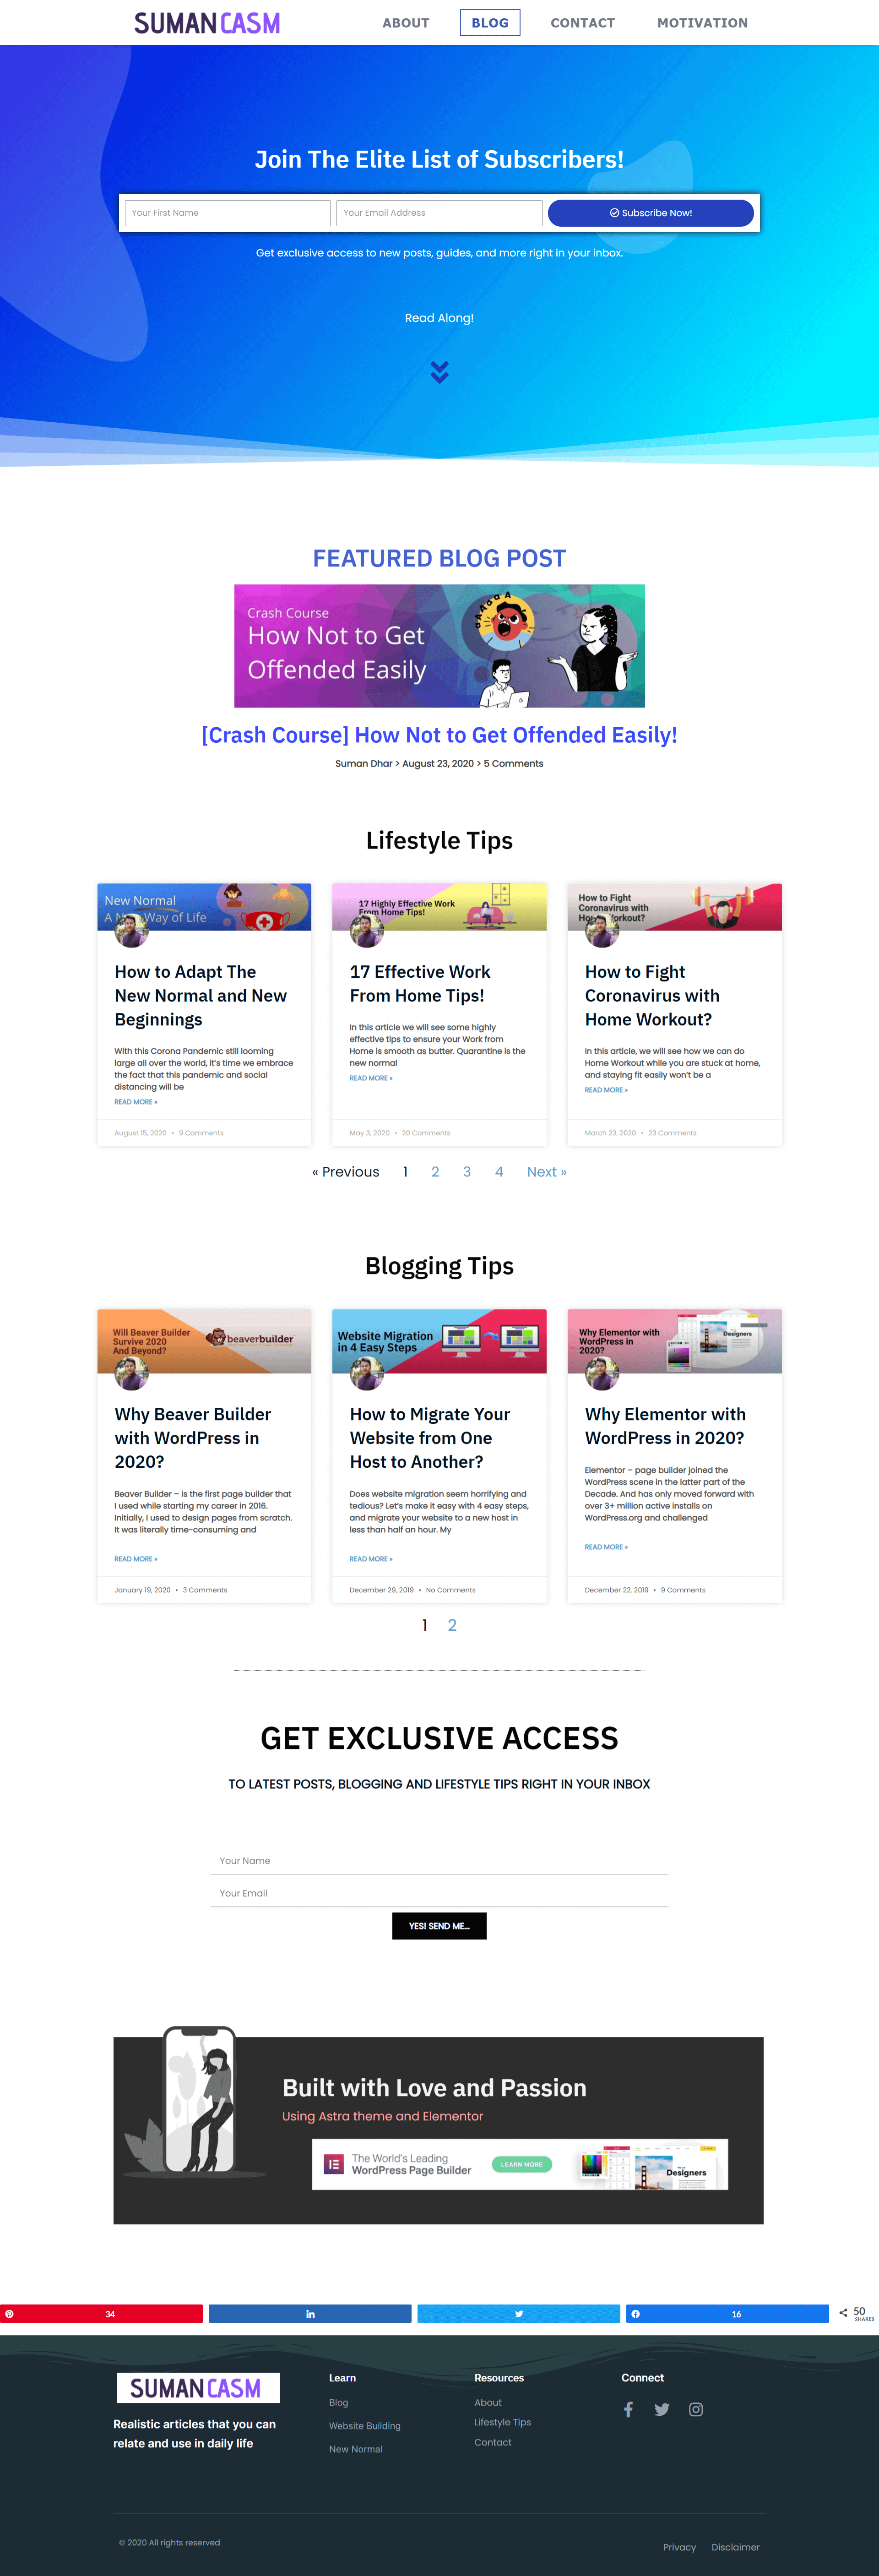
Page Builder will basically help you to build nice interactive pages. For e.g. just like my Blog’s pages.
I have used Elementor Page Builder free version and with the use of other plugins achieved the layout.
While, you can use the Elementor Pro version, which provides unlimited possibilities to design your page.
For a portfolio website, I would recommend Elementor Pro. It will help you add Images, create a Photo Gallery, display Countdown, and unlimited possibilities.
Here’s a pre-made layout made available a few days back from Elementor, which allows you to insert the pages, edit and you are done setting up your Portfolio or Blog pages.
Step 8: Add Content like Posts
Let’s add content to your website if yours is a blog, start with adding content to your posts.
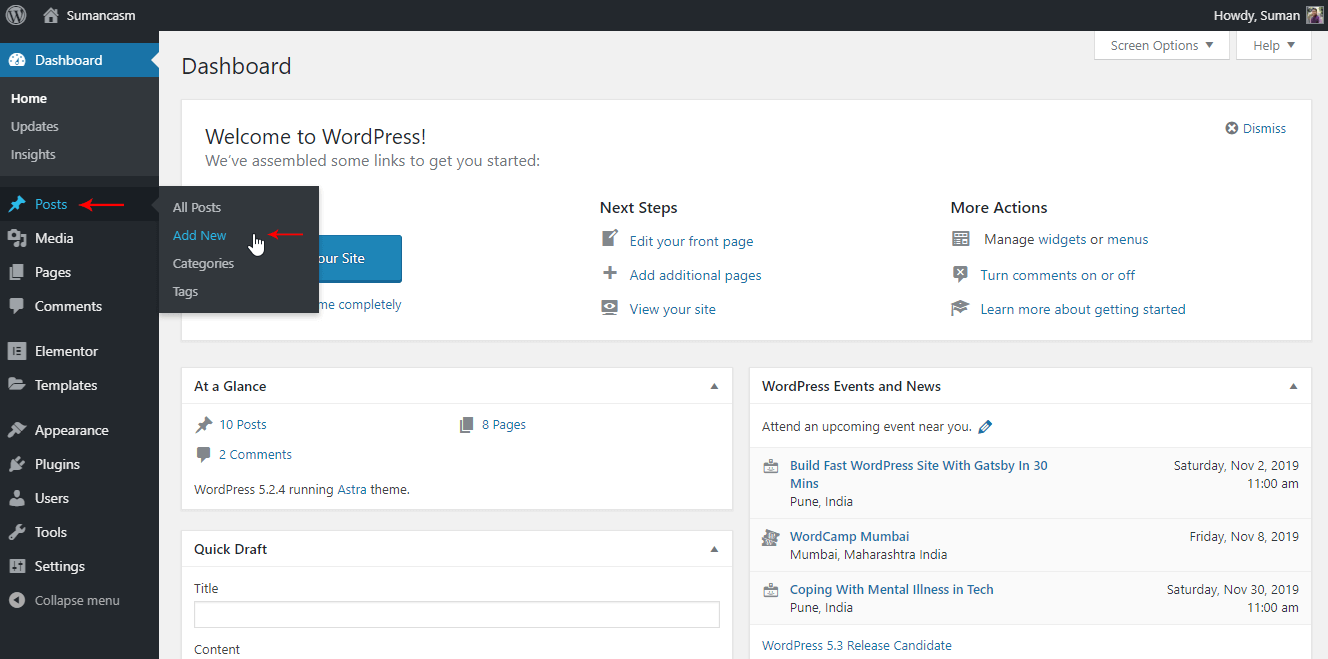
You will find the option to insert Posts under WordPress Dashboard > Posts > Add New
Start with adding the content of your posts through the Gutenberg editor, insert images and creatives as required.
Preview the post on how they will display on the frontend, by clicking on the Preview button on the top-right corner.
The posts you create here will display under a Page which you select as Blog page under Settings > Writing > Blog Page.
That will be all, for the bloggers to add the content, others can create various pages using the Gutenberg editor or Elementor.
Step 9: Optimize your content, Images, Site
With all the pages and content, we need to make sure the content on your website is optimized. Why is it so?
Remember closing a tab while visiting a website, as it took to long to load? This means the site you were visiting wasn’t optimized to load as fast.
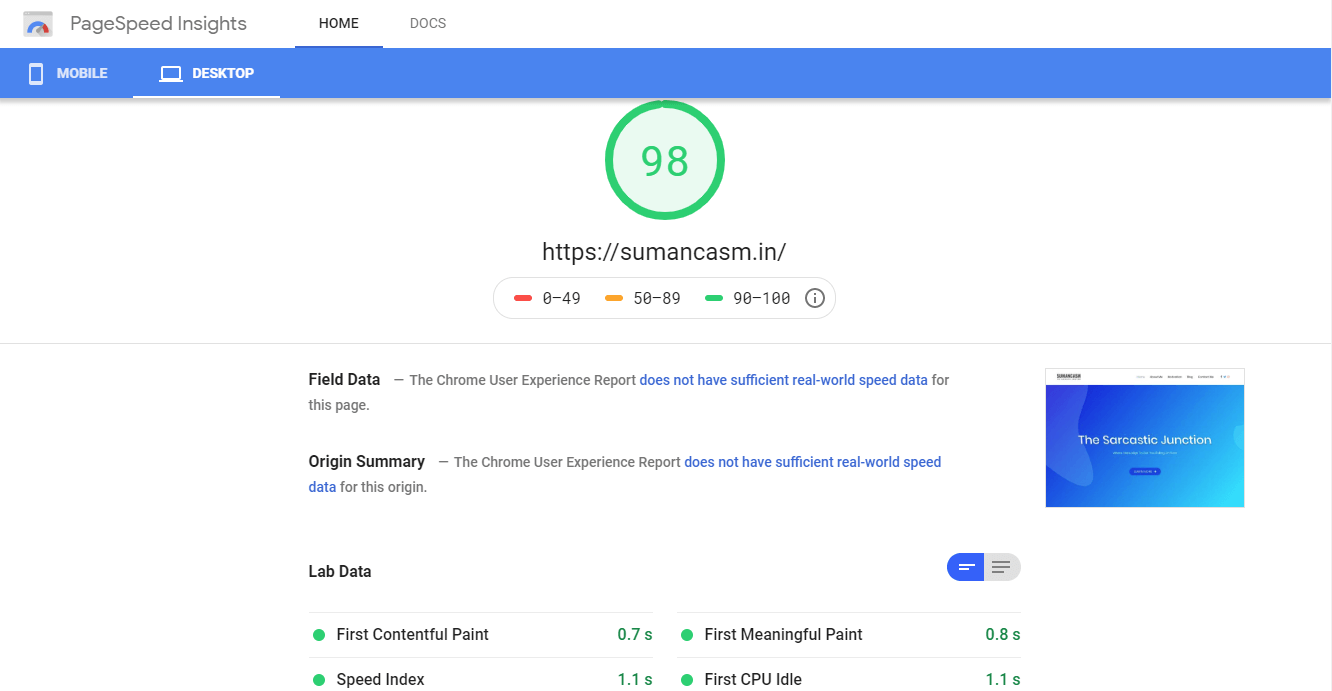
The first thing to make your website or blog lightning fast is to choose a lightweight theme. And we are already using the fastest and lightest theme – Astra.
Now, what needs to be taken care of is the optimized content that includes Images of appropriate sizes on the pages, that make sure the images load properly. Without causing delay or loading endlessly.
Step 10: Make your Content Google Search Ready
Does the title seem a bit technical? Well, it isn’t. You just need to have the Yoast plugin installed and activated.
After that, Yoast adds a section below each post and page of your website. Here, you will need to enter the details of how you want your content to be displayed on Google Search results, with a preview right there.
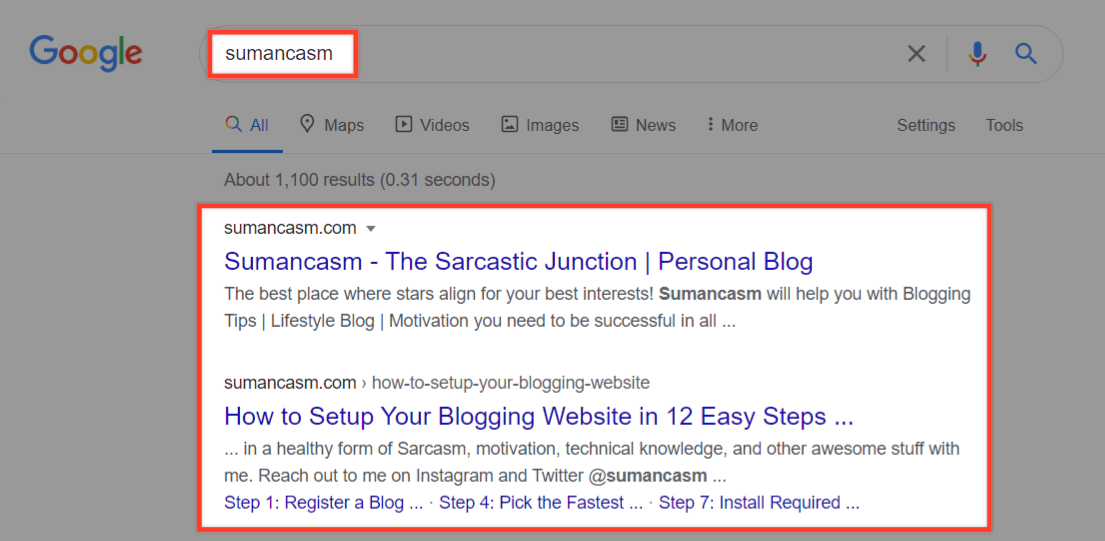
Take a look at the example of my website. Isn’t it super cool?
Step 11: Share Your Writing on Social Media
Now comes the part to let the world know about your new blogging website, which will be live or will be available soon using a Coming Soon page. This is a trending fad these days to attract users.
Websites and blogs offer discounts or premiere codes for users subscribing to early-bid subscribers.
You can display a countdown to let your users know that your website is about to go live soon. We will also, see in upcoming posts how to create a newsletter that will notify the users when your website goes live.
The users will only be notified when they subscribe to your newsletter on the Coming Soon page.
Send out emails to your bloggers of the latest blogs, weekly once or twice. Do not spam, them as no wants to see unnecessary emails in their inbox.
Share tricks and tips with them, do not share only your latest posts. Give them a teaser of upcoming posts, events, meetups, etc.
Create a connection with users, so that they will visit your website for more upcoming stuff.
Step 12: Monetize
One of the less-talked-about or most searched topic is how to earn from your blog. I have an answer for you.
A Blog website like mine, you can apply for Google AdSense, Adwords, etc.
For which Google has laid down some rules and guidelines while applying and getting your site monetized.
Firstly you need to have a certain number of visitors visiting your website, your content should not be copied.
Your website should have certain pages like About Us, Privacy, Disclaimer, etc.
Sit Back and Relax
Well, no more steps to follow. Your blogging website is ready to rock the world.
Give yourself a pat on your back to complete setting up a WordPress Blogging Website at the first instance!
You can always come back, just bookmark the post for future references.
While if you need any help or have some questions, do ask them below or reach me on Twitter, Facebook or Instagram. Or you can even drop me an email.
We will be covering some interesting stuff in our upcoming posts, coming very soon after this post.
Don’t forget to leave a comment, and let me know what you think of the post. And what would you like me to cover in the next post?
Check out my other lifestyle blog posts, on how they helped me with my transformation of losing approx. 6% body fat in less than 4 months. :heart-eyes:






58 thoughts on “How to Setup Your Blogging Website in 12 Easy Steps?”
Wow great post! Just What I Needed?? Thanks man!
Glad to help! Do reach out to me if you need any help during the setting up your Blogging Website. 🙂
WordPress is nice..I have use Elementor it’s Good tool and easy to use.
Btw great post to setting of blogging website in simple steps.??
That’s great to hear, Nandini and thanks for the appreciation! Do not forget to share with friends who might need to set up a Blogging or Portfolio Website. 🙂
Easy guidelines for creating blog website. ?
Nice… You made it so easy… Keep going and share more information with us.?
Thanks, Julekha for the appreciation! Will surely me moving forward. Cheers to more. 🙂
Nice one…! Such a brief and descriptive post. Really helpful. Thanks Suman. ?
Glad to be helpful! 🙂
Hey Suman, Definitely a great write-up and tutorial. Will recommend it to friends. 🙂
Glad that I could help! 🙂
Wow those tips really are useful!
Glad to help, Mustafa! 🙂
Great and well explained ?,
Thanks! Glad to help. 🙂
Helpful article!
So glad to help! 🙂
Thanks for the detailed post, Suman!?. I will be surely following this soon.
Glad to hear that! Do not forget to share the work with us. 🙂
This blog was… how do I say it? Relevant!! Finally I’ve found something which helped me. Appreciate it!
That’s great to hear! Do not forget to share with your peers. 🙂
It’s an remarkable piece of writing for all the online users; they will obtain benefit from it I am sure.
So glad to hear that, Stefan! Do share the post which will benefit everyone out there. 🙂 #Sumancasm
only first time…
Touche. Outstanding arguments. Keep up the amazing spirit.
Glad that you liked it. 🙂
This post will be super helpful for new bloggers! For me, coming up with a domain name was the hardest part haha. :’)
So glad that I could help newbies out there! Coming up with domain name is a challenging part as it can’t be changed. Hope I could simplify the process. ?
Really helpful post. One of my biggest blog errors that I am not sure now how to fix is not being self hosted.
I wish I’d found a post like this before I got started x
Love the easy to read format and style of your blog article!! Great information!
Thank you so much! Glad that you liked it. Do not forget to share the knowledge with others. 🙂
If I move to WordPress do I lose my adsense?
No, you don’t lose your Adsense. Usually, an approved AdSense account, allows you to put ads on multiple websites that comply with the AdSense terms of service. You do not need to set up separate accounts for different blogs.
This paragraph offers clear idea designed for the new visitors of blogging, that truly how to do
blogging and site-building.
I’m extremely pleased to discover this web site. I need to thank you for ones time for this fantastic read!! I definitely really liked every little bit of it and
i also have you bookmarked to see new things on your web site.
Write more, that’s all I have to say. You obviously know what you’re talking about.
Hi! Do you use Twitter? I’d like to follow you if that would be okay. I’m undoubtedly enjoying your blog and look forward to new updates.
Hello there,
Yes, surely I am on Twitter. My username is @sumancasm or go directly to https://twitter.com/sumancasm
Happy to connect with you! 🙂
Thanks in support of sharing such a nice article
Excellent beat ! I would like to apprentice at the same time as you amend
your site, how can i subscribe for a blog site? The account helped me a appropriate deal.
I were a little bit acquainted of this your broadcast provided vivid clear concept
Nice post. I learn something new and challenging on blogs I stumbleupon everyday. It will always be interesting to read articles from other writers and use something from other websites.
Awesome blog article.Really looking forward to read more. Want more.
This is really helpful to the person who want to learn term about blogging. Each and every topic regarding blogging is explained in very simply & perfectly. Our team will definitely take care to follow all the steps you mention in this artical.
I’m grateful for the article post. Really looking forward to reading more. Great!
Pingback: 21 Day Challenge Survival Tips and Tricks! - Sumancasm
I was recommended this web site by my cousin. I am not sure whether this post
is written by him as no one else know such detailed about my trouble.
You are incredible! Thanks!
Hey Christal, thanks to your cousin for recommending this website! Well, you read more about the author here.
Cheers to that! 🙂
I every time spent my half an hour to read this website’s posts every day along with a mug of coffee.
So glad to hear that! 🙂
I like the valuable information you provide for your articles. I will bookmark your blog and check once more right here frequently. I am fairly sure I will be told many new stuff proper right here! Good luck for the following!
Much appreciated! 🙂
This is really interesting, You’re a very skilled blogger. I have joined your rss feed and look forward to seeking more of your wonderful post. Also, I have shared your site in my social networks!
That’s awesome, Robert!
Hiya, I’m really glad I have found this information. Nowadays bloggers publish only about gossips and net and this is really irritating. A good website with exciting content, is what I need. Thank you for keeping this site, I will be visiting it. Do you do newsletters? Can’t find it.
Glad to hear that! You can find the newsletter on the blog page.
I couldn’t refain from commenting. Well written!